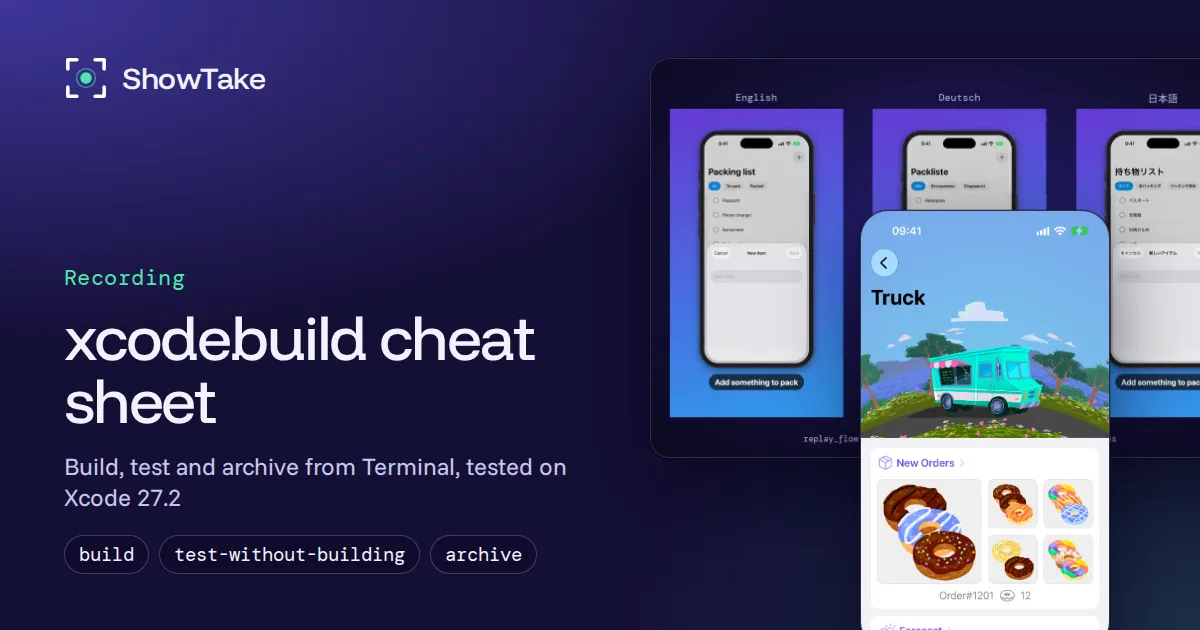
xcodebuild is Apple's command-line tool for building, testing, analyzing and archiving Xcode projects, workspaces and Swift packages: it does what the Build, Test and Archive commands do in Xcode, without opening the app. The basic form is xcodebuild -scheme <name> -destination <where> <action>, where the action is build, test, build-for-testing, test-without-building, archive or clean.
The top results for "xcodebuild" today are a 2011 blog post, a Stack Overflow thread, a Facebook answer and a Chinese tutorial. This cheat sheet is current: the commands below were run on November 17, 2026 on an M4 Mac mini with macOS 27.2.1 and Xcode 27.2 (27B52), against Apple's Food Truck sample app and an open-source SwiftUI app with 81 unit tests. The timings and error messages are what we got; the one step we could not run (export, which needs a signing team) says so.
xcodebuild cheat sheet
The table uses two destinations; set them once in your shell:
SIM='platform=iOS Simulator,name=iPhone 17 Pro'
DEVICE='generic/platform=iOS'| Task | Command |
|---|---|
| Xcode and SDK versions | xcodebuild -version / xcodebuild -showsdks |
| Schemes, targets, configurations | xcodebuild -list (add -json for scripts) |
| Where a scheme can run | xcodebuild -scheme MyApp -showdestinations |
| Build settings (bundle id, version) | xcodebuild -scheme MyApp -showBuildSettings -json |
| Build for a simulator | xcodebuild -scheme MyApp -destination "$SIM" build |
| Build and run all tests | xcodebuild -scheme MyApp -destination "$SIM" test |
| Build tests once, run them later | build-for-testing, then test-without-building |
| Run one test class | -only-testing:MyAppTests/LoginTests |
| Archive for release | xcodebuild -scheme MyApp -destination "$DEVICE" archive |
| Export an .ipa | xcodebuild -exportArchive -archivePath <archive> … |
| Clean | xcodebuild -scheme MyApp clean |
| Accept the license | sudo xcodebuild -license accept |
| Download a simulator runtime | xcodebuild -downloadPlatform iOS |
Pass -workspace MyApp.xcworkspace when your project lives in a workspace (CocoaPods, several projects). Run from a folder with exactly one .xcodeproj and you can leave -project out. xcodebuild -help prints every flag; in Xcode 27.2 that is 215 lines.
Inspect a project before you build
Start by asking the project what it contains. On the Food Truck sample:
xcodebuild -list
#     Targets:
#         Food Truck
#         Food Truck All
#         Widgets
#     Build Configurations:
#         Debug
#         Release
#     If no build configuration is specified and -scheme is not passed then "Release" is used.
#     Schemes:
#         Food Truck
#         Food Truck All
#         FoodTruckKit
# WidgetsThat last note matters. xcodebuild build with no scheme builds the project's targets in Release for a real device, and on a project without a signing team it fails at once:
error: Signing for "Food Truck" requires a development team. Select a development team in the Signing & Capabilities editor.Always pass -scheme, plus a simulator destination when you do not want to sign.
-showdestinations lists where a scheme can run: My Mac, Any iOS Device, Any iOS Simulator Device and every simulator you have, each with its id. -showBuildSettings prints a few hundred settings; with -json you can pick the ones you need with jq:
xcodebuild -scheme "Food Truck" -configuration Release -showBuildSettings -json \
  | jq '.[0].buildSettings | {PRODUCT_BUNDLE_IDENTIFIER, MARKETING_VERSION, CURRENT_PROJECT_VERSION}'
# {
#   "PRODUCT_BUNDLE_IDENTIFIER": "com.example.apple-samplecode.Food-Truck",
#   "MARKETING_VERSION": "1.0",
#   "CURRENT_PROJECT_VERSION": "1"
# }xcodebuild -showsdks listed the iOS 27.2 SDK while the installed simulator runtime was iOS 27.0. That is normal: the SDK comes with Xcode, the runtimes are separate downloads, and a destination picks a runtime, not an SDK.
Build for the Simulator with xcodebuild build
-destination is a comma-separated list of key=value pairs. The three forms you will use:
| Destination | What it means |
|---|---|
platform=iOS Simulator,name=iPhone 17 Pro | A simulator by name; the newest OS unless you add OS=27.0 |
platform=iOS Simulator,id=<UDID> | One exact simulator (best in scripts) |
generic/platform=iOS | Any iOS device; used for archives, needs no device attached |
We created a throwaway simulator and built the app into a folder we chose:
UDID=$(xcrun simctl create "Build iPhone" "iPhone 17 Pro")
xcodebuild -scheme "Food Truck" \
  -destination "platform=iOS Simulator,id=$UDID" \
  -derivedDataPath ./build \
  build
# ** BUILD SUCCEEDED **The first build took 23.8 seconds with -jobs 6; running the same command again with -quiet took 1.5 seconds, because nothing had changed. -quiet prints only warnings and errors, which is what you want in CI logs and in an agent's context window. -derivedDataPath keeps the products in a known place instead of a hashed folder under ~/Library/Developer/Xcode/DerivedData, so the next step can find the app:
APP="./build/Build/Products/Debug-iphonesimulator/Food Truck.app"
xcrun simctl bootstatus "$UDID" -b
xcrun simctl install "$UDID" "$APP"
xcrun simctl launch "$UDID" com.example.apple-samplecode.Food-Truck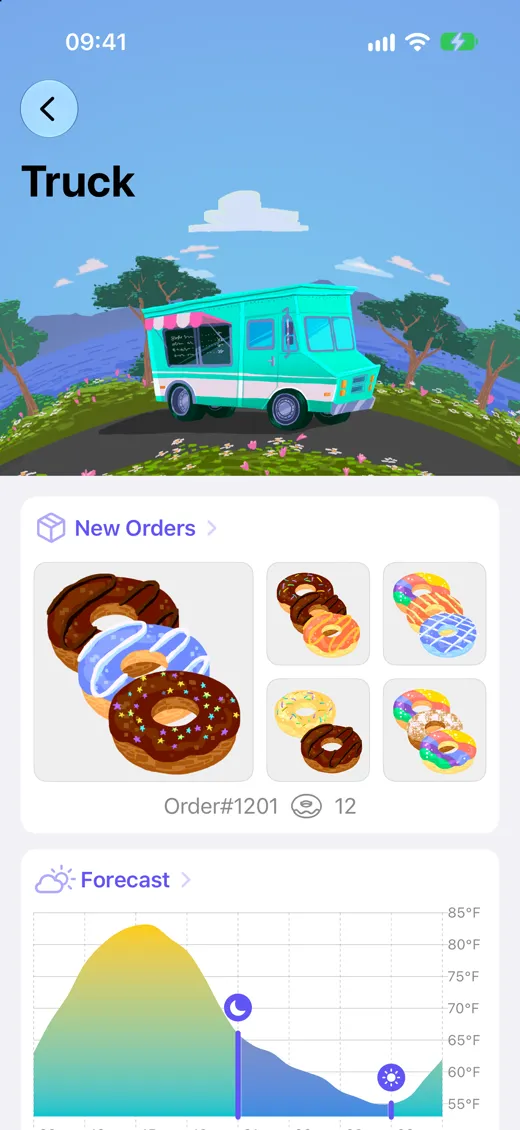
xcodebuild build, simctl install and simctl launch, with the status bar set to 9:41 by simctl status_bar. Every simctl command is in our simctl cheat sheet.Build settings can be overridden at the end of the command, for example CODE_SIGNING_ALLOWED=NO or SWIFT_TREAT_WARNINGS_AS_ERRORS=YES. They apply to every target in the build. For several overrides, put them in a file and pass -xcconfig Overrides.xcconfig.
Run tests: test, build-for-testing, test-without-building
xcodebuild test builds the app and its tests and runs them on the destination. In CI it is often better to split the two halves, so one build serves several test runs or machines:
- Build the tests once:
xcodebuild -scheme CountriesSwiftUI -destination "platform=iOS Simulator,id=$UDID" -derivedDataPath ./build build-for-testing. This took 26.6 seconds and wrote the app, the test bundle and a file namedCountriesSwiftUI_CountriesSwiftUI_iphonesimulator27.2-arm64.xctestruntobuild/Build/Products. - See what would run: add
-enumerate-tests -test-enumeration-style flatto atest-without-buildingcommand. It listed 81 tests asUnitTests/WebRepositoryTests/loadSuccess()and so on, without running them. - Run a subset from the built products:
xcodebuild -xctestrun build/Build/Products/*.xctestrun -destination "platform=iOS Simulator,id=$UDID" -only-testing:UnitTests/WebRepositoryTests -resultBundlePath r1.xcresult test-without-building. All 8 tests in that class passed. - Read the result bundle:
xcrun xcresulttool get test-results summary --path r1.xcresult --compactreturns JSON with"result": "Passed",totalTestCount,passedTests,failedTestsand the device it ran on.
-only-testing and -skip-testing take Target, Target/Class or Target/Class/method(), and you can repeat them. Other flags worth knowing: -test-iterations 5 -retry-tests-on-failure for flaky tests, -enableCodeCoverage YES, -testPlan <name> (-showTestPlans lists them; on Food Truck it said The scheme "Food Truck" is not configured to use test plans), and -testLanguage de -testRegion DE to run in another locale.
Archive and export for the App Store
An archive is a Release build for real devices, plus its debug symbols, in an .xcarchive folder. It needs generic/platform=iOS (or a connected device) as the destination:
xcodebuild -scheme "Food Truck" \
  -destination 'generic/platform=iOS' \
  -archivePath ./FoodTruck.xcarchive \
archiveThe sample has no signing team, so we added CODE_SIGNING_ALLOWED=NO to see the shape of an archive: the run took 72.9 seconds and produced Products/Applications/Food Truck.app, a dSYMs folder and an Info.plist with the version, build number, architectures (arm64) and an empty Team. An unsigned archive cannot be exported or uploaded; with your team set in the project, leave the override out.
Exporting turns the archive into an .ipa (or uploads it). The settings live in a plist; these keys come from xcodebuild -help in Xcode 27.2:
<?xml version="1.0" encoding="UTF-8"?>
<!DOCTYPE plist PUBLIC "-//Apple//DTD PLIST 1.0//EN" "http://www.apple.com/DTDs/PropertyList-1.0.dtd">
<plist version="1.0">
<dict>
  <key>method</key><string>app-store-connect</string>
  <key>destination</key><string>export</string>
  <key>teamID</key><string>ABCDE12345</string>
</dict>
</plist>xcodebuild -exportArchive -archivePath ./FoodTruck.xcarchive \
-exportPath ./export -exportOptionsPlist Export.plist \
-allowProvisioningUpdates| Key | Values (Xcode 27.2) |
|---|---|
method | app-store-connect, release-testing, enterprise, debugging, developer-id, mac-application, validation |
destination | export (write files, the default) or upload (send to App Store Connect) |
manageAppVersionAndBuildNumber | Let Xcode raise the build number on upload (default YES) |
testFlightInternalTestingOnly | Build can't go to external TestFlight or the App Store |
uploadSymbols / stripSwiftSymbols | Include symbols / strip Swift symbols (both default YES) |
We did not export, because the sample has no team; the commands above are the documented form. On a CI machine without a logged-in Xcode account, add -authenticationKeyPath AuthKey.p8 -authenticationKeyID <key id> -authenticationKeyIssuerID <issuer id> (an App Store Connect API key) so -allowProvisioningUpdates can create and update profiles. For Mac apps, -exportNotarizedApp exports an archive after Apple has notarized it. Once the build is in TestFlight, TestFlight feedback explains where your testers' screenshots and crash reports show up.
Setup commands: license, first launch, runtimes, Metal
These are the commands behind "sudo xcodebuild" searches. They change the machine, not a project:
sudo xcodebuild -license accept      # accept the Xcode and SDK license without the dialog
xcodebuild -checkFirstLaunchStatus   # exit code 0 = nothing left to install
sudo xcodebuild -runFirstLaunch      # install the first-launch packages and agree to the license
xcodebuild -downloadPlatform iOS     # download the matching iOS simulator runtime
xcodebuild -showComponent metaltoolchain
xcodebuild -downloadComponent metaltoolchainOn our Mac, -checkFirstLaunchStatus returned 0 and -showComponent metaltoolchain printed Status: installed with build 27B47. In Xcode 27.2 the Metal toolchain is a separate component (the help lists metaltoolchain and devicesupport for -downloadComponent), so a fresh CI image that builds Metal shaders needs that download first.
Fix common xcodebuild errors
| Error message contains | Cause | Fix |
|---|---|---|
tool 'xcodebuild' requires Xcode | Only the Command Line Tools are selected | Select Xcode with xcode-select (below) |
Unable to find a device matching | Wrong simulator name or OS | Copy a line from -showdestinations, or use id= |
does not contain a scheme named | Typo, or the scheme is not shared | xcodebuild -list; share the scheme in Xcode |
requires a development team | Device build without a team | Build for a simulator, or set DEVELOPMENT_TEAM |
have not agreed to the Xcode license | New Xcode install | sudo xcodebuild -license accept |
We reproduced the first one without touching the Mac's setup by pointing one command at the Command Line Tools:
DEVELOPER_DIR=/Library/Developer/CommandLineTools xcodebuild -version
# xcode-select: error: tool 'xcodebuild' requires Xcode, but active developer directory
# '/Library/Developer/CommandLineTools' is a command line tools instance

sudo xcode-select -s /Applications/Xcode.app/Contents/Developer # the permanent fixThe DEVELOPER_DIR variable is also how you pick one of several installed Xcodes for a single command. The destination error lists every compatible destination right below it, and when xcodebuild fails early it still writes a result bundle to a temporary folder, which is the path it prints.
From a green build to a demo video
A coding agent uses the same commands: Claude Code, Codex and Cursor run xcodebuild to check that a change compiles and the tests pass, and MCP servers such as MobileBuildMCP wrap it (we compared them in iOS Simulator MCP servers and covered Apple's own bridge in Xcode MCP). A green build proves the code works. It does not show anyone what the app does.
That is the step ShowTake adds. Your agent calls prepare_ios, which builds the app in Release, clones a clean simulator with the status bar at 9:41, installs and launches it. Then the agent drives the app through its accessibility tree while ShowTake films the take, zooms on every tap and turns the agent's step notes into captions. A clean take saves as a flow, so after the next xcodebuild and release you replay it without an agent and get an up-to-date video.
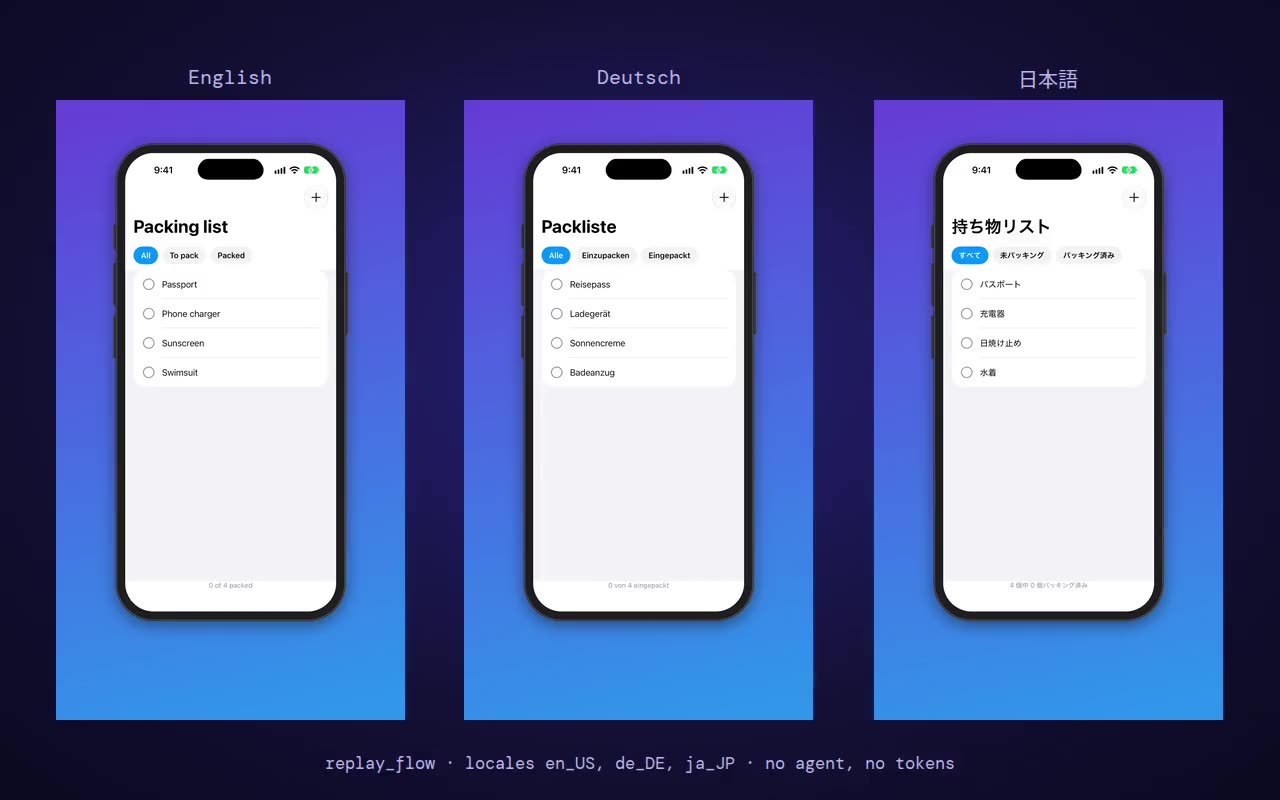
What ShowTake does not do: it is not a build system or a test runner (no assertions, no CI), it does not record real devices or Android, and it does not replace xcodebuild in your scripts. Free vs Pro. The free plan films, adds library music and captions, and exports the X 16:9 preset with a small watermark. Pro adds every other preset, App Previews, App Store screenshots and the launch kit, 4K, batch replays across languages and devices, and your own audio files. All tools are in the tool reference and saved flows in flows and replays; to start, download ShowTake or paste showtake.app into your agent.
Film it with your agent
ShowTake is a Mac app with a built-in MCP server: your coding agent drives your app and ShowTake renders the zooms, captions and every export size. Free to try, with a watermark.
Common questions
What is xcodebuild?
xcodebuild is the command-line tool that ships with Xcode for building, testing, analyzing and archiving projects, workspaces and Swift packages. It runs the same build system as the Xcode app, so a scheme that builds in Xcode builds the same way in Terminal and in CI.
How do I build an iOS app from the command line?
Run xcodebuild -scheme MyApp -destination 'platform=iOS Simulator,name=iPhone 17 Pro' build in the project folder. Add -workspace MyApp.xcworkspace if you use a workspace and -derivedDataPath ./build to choose where the .app goes. For a device or App Store build, use -destination 'generic/platform=iOS' with the archive action.
What does sudo xcodebuild -license accept do?
It accepts the Xcode and SDK license agreements for every user on the Mac without opening Xcode. It needs sudo because the acceptance is stored system-wide. Run it once after installing or updating Xcode, typically on a CI machine.
What is the difference between xcodebuild test and test-without-building?
test builds the app and the tests, then runs them. test-without-building only runs tests that were already built by build-for-testing, using the .xctestrun file that step writes. Splitting them lets you build once and run the tests many times, on several simulators or machines.
Where does xcodebuild put the built app?
By default in a hashed folder under ~/Library/Developer/Xcode/DerivedData, in Build/Products/<Configuration>-<platform>, for example Debug-iphonesimulator. Pass -derivedDataPath ./build and it goes to ./build/Build/Products/… instead. xcodebuild -showBuildSettings shows the exact folder as BUILT_PRODUCTS_DIR.
Can xcodebuild run the app in the Simulator?
No. xcodebuild builds and runs tests, but it has no "run" action for apps. Install and launch the built .app with xcrun simctl install and xcrun simctl launch, as in the build section above.
ShowTake for Mac
Let your coding agent film the demo
Your agent drives your iOS app in the Simulator or your Mac app; ShowTake records every tap and renders zooms, captions, App Store previews, screenshots and social cuts. Free to try, with a watermark.